How to upload a macro, manage Store listing, back up macros
The first thing that you need to do is to sign up for a Developer Account.
Join our Discord to get access to the Developer Account Registration Form.
We need a reliable way for us and other users to contact you and we chose Discord for that, so having a Discord account is one of the requirement
You will also be required to upload one macro as part of the registration process. So read on
To upload a macro go to Store -> Upload -> +
You can only upload one macro at a time, macro must be reviewed and approved before you can upload another.
When you upload new or update old macro, your changes will be reviewed by the Reviewers and it will only be applied when approved. Until then you can make as many changes as you like but beware that your changes will be queued to the end of the Reviewers's list every time you submitted.
Fill out the information about your macro that will appear in your Store listing
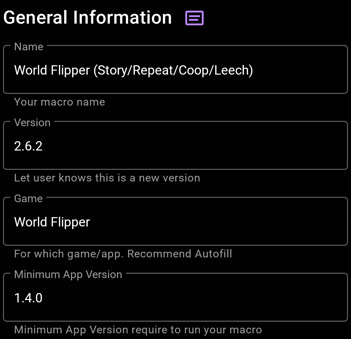
- Name: Name of your macro
- Version: The current macro version. You can use whatever you like as long as it conveys to the users the progress of your macro. This should also match the file version
- Game: Name of the game this macro was made for. You should use the name the system has chosen when first creating a new macro
- Minimum App Version: Default set to the current version, this ensure that the users using your macro is on the same version as yours for maximum compatibility. Users on lower version will be asked to update the app before downloading
Description for your macro. You should at least provide two things: "What does this macro do?" and "How to use this macro"
Use when you update your macro. This is where you keep your version's logs
You can apply style, heading, add images and links to the Description and Release Note of your macro by using markdown
Learn markdown here: https://www.markdownguide.org/basic-syntax/
Frequently asked markdown:
-
Link to website:
[name](url) -
Embedded image:
. You can use this site to upload your image and get direct link
You can localize the Description and Release Note of your macro by using Language Tag. Example:
This is a macro description
<fr>Ceci est une description de macro</fr>
If the user device's language is set to French (fr) then whatever in the fr tag will be shown, others that does not match the language tag will see the default "untag" description
For the full list of language code: https://en.wikipedia.org/wiki/List_of_ISO_639-1_codes
Select an icon for your macro. Max size is 512x512
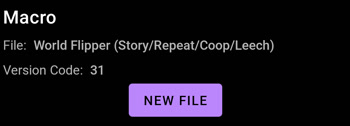
Select the macro file to upload.
Everytime a new file is uploaded, the Version Code is increased by 1. This Version Code is used to notify the user that there's a new update available.
If you only need to update the store listing information then you don't need to select a new file.
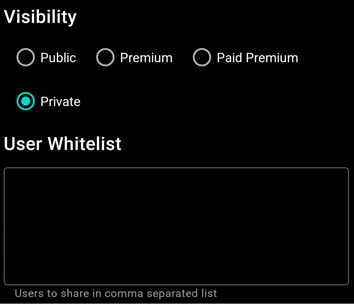
New in 1.4.0+. This option let you control how the users will see the macro. There 4 modes available:
- Public: This is the usual normal mode where your macro can be seen by anyone.
- Premium: Only Premium users will see this macro (Trial and Paid).
- Paid Premium: Only Paid Premium users will see this macro.
- Private: Only users in the whitelist will see this macro (Each macro can only be shared up to 10 users).
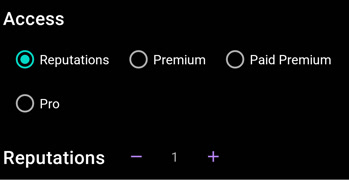
New in 1.4.0+. This option let you control if the users are allowed to install the macro.
- Reputation: This is the usual normal mode where the user will give you reputations upon installing.
- Premium: Only Premium users can install this macro (Trial and Paid).
- Paid Premium: Only Paid Premium users can install this macro.
- Pro: Users must pay a one time fee to unlock the macro first. More on Monetize.
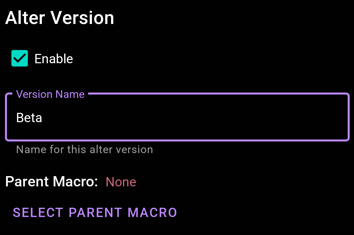
New in 1.4.0+. This option let you group multiple related macro together under one entry in the Store.
For example a macro might have a Free version, Beta version, Pro version, Tablet version, etc... It's not good to clutter the Store with all those versions but instead you should put them together and users can select which version to install.
The version that appear on the Store list is called the Parent Version while the versions under it are called Child Version.
Version Name here is a friendly name that let user tell your version apart (Free, Beta, Pro, etc..). Do not confuse this with version "number"
Alter Version is required if that version's Access mode is set to Pro.
Make sure your macro is release-ready by testing it against multiple devices.
The most common devices you should consider are:
- Normal Device: Devices with 16:9 ratio (Emulators, old phone). Example resolution: 1280x720, 1600x900, 1920x1080
- Tall Device: Device with larger than 16:9 ratio (most newer phones). Example resolution: 1520x720 (19:9), 2400:1080 (20:9)
- Tall Device with notch: Lot of devices will have notch (the unusable part with the front camera)
- Fat Device: Tablet. Common resolution is 1280x800, 1920x1200
You should also take performance into consideration. Macro should be able to run all night without being interrupted or killed by system.
Common technique to increase the performance is use Cache and reduce the workload (put a simple wait at the end of the loop when you don't need fast reaction).
Some common mistakes should be avoided when you're filling out your store listing:
-
Update macro version in both store listing and file.
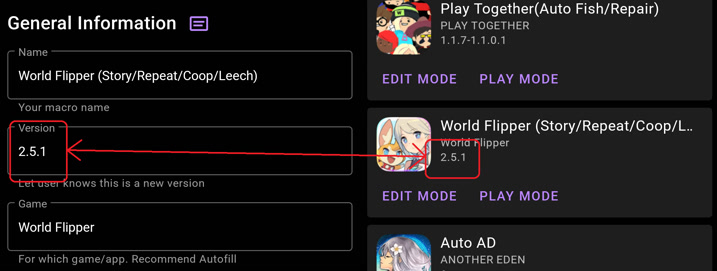
- Make sure to always update your Release Note whether you upload a new version.
- Default language must be English (unless the game is only available in a specific language). Use Language Tag to localize the text.
Developers will gain access to backup feature. Access from 3-dot menu -> Tools -> Backup
© 2026 - Macrorify by KoK-CODE
